Introduction
This page describes how to set up a Linux cluster using PVM (parallel virtual machine). It also shows some examples.
The purpose is not to show an optimized environment, but one that does work and may show how to do it basically.
Hardware Setup
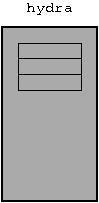
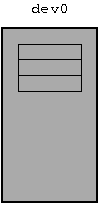
The hardware setup in this tutorial is fairly simple: just to ordinary PCs. It could be your current machine and some older, not in use any more, as it is in this tutorial. Those two machines are connected through a normal ethernet connection (twisted pair). Not as spectacular as a hypercube, but sufficient for the purpose of the tutorial. Figure 1 shows the hardware setup.

Please note the heterogenous setup of one 32bit Intel and one 64bit AMD machine (and it still works).
In this setup hydra works as master and dev0 as slave. For the entire tutorial, I will call them hydra and dev0 as synonyms for master and slave.
Machine details:
| Maschine | Spezifikation |
|---|---|
| hydra | CPU: Intel Core2 Q6600 (2.4GHz) |
| RAM: 3GB | |
| Ethernet: 1000BaseT | |
| OS: Kubuntu 8.04 | |
| IP: 192.168.100.200 (static) | |
| dev0 | CPU: AMD64-3800 (2.4GHz) |
| RAM: 1GB | |
| Ethernet: 100BaseT | |
| OS: Xubuntu 8.04 | |
| IP: 192.168.100.210 (static) |
Software Setup
There are several packages needed to be installed. Using the Linux distributions mentioned above, they are very easy to install (adept, synaptic or apt-get).
The software packages have to be installed on both machines. The packages are:
- gcc (gcc-4.2 in this case)
- openssh-client
- openssh-server
- nfs-kernel-server
- pvm
- pvm-dev
- xpvm (only on hydra)
Go through the following sections and configure the packages.
Basic System
On both machines has to exist the same user. In my case I created on both machines the user mario which will be use throughout this tutorial.
Make sure the two machines know each other:
 |
 |
The file /etc/hosts must contain: 192.168.100.210 dev0 |
The file /etc/hosts must contain: 192.168.100.200 hydra |
Create directory: $ mkdir ~/pvm $ mkdir ~/pvm/LINUX $ mkdir ~/pvm/LINUX64 |
Create directory: $ mkdir ~/pvm |
The easiest way is to perform this step is during installation of the system.
Feel free to install/use DHCP, BOOTP or something if you like.
SSH
Between the two machines you’ll need a ssh connection.
Generate a key pair and move the public key to the server (in this case dev0). Go through the following steps to achieve this:
|
|
Create key pair (private key and public key): $ ssh-keygen -b 2048 -t rsa |
|
creates the file ~/.ssh/id_rsa.pub which has to be transferred to the other machine using scp: $ scp .ssh/id_rsa.pub mario@dev0:id_rsa.pub |
creates /home/mario/id_rsa.pub as a copy |
Login to dev0: $ ssh mario@dev0 |
|
Append the file to .ssh/authorized_keys: $ cat id_rsa.pub >> .ssh/autorhized_keys |
|
| Make sure to have a correct configuration for the ssh serer. Edit the file /etc/ssh/sshd_config and make sure to have the following lines: PermitRootLogin yes RSAAthentication yes PubkeyAuthentication yes AuthorizedKeysFile %h/.ssh/authorized_keys |
|
Restart the SSH server: $ sudo /etc/init.d/ssh restart |
From now on you can login from hydra to dev0 simply typing:
NFS
For an easy transfer of the source/program form hydra to dev0 we’ll use NFS (network file system).
This tutorial assumes you will have your PVM programs in /home/mario/pvm on hydra.
|
|
TODO
Now dev0 will be able to access source/binary of the program, provided by hydra.
PVM
On the Kubuntu/Xubuntu systems, the installation directory of the PVM package is /usr/lib/pvm3.
We will have to define the environment variables PVM_ROOT and PVM_ARCH. If you are not sure which architecture you will have to set, just run:
In this tutorial the architecture is defined as LINUX and LINUX64 respectively.
|
|
TODO
The symbolic links are necessary because PVM searches for the binaries to execute in the path $PVM_ROOT/bin/$PVM_ARCH. In this case, it is linked to place where the binaries really are (eighter local for hydra or over NFS for dev0).
Running PVM
In order to let the PVM programs to run, pvmd must run on each machine.
To achieve this, make sure pvmd is running through /etc/init.d or start it manually:
|
|
TODO
You might want to check the virtual machine graphically using xpvm (see Figure 2).

Examples
This chapter shows some examples, how to build them and how to run them on the cluster.
Building Programs
Each example will have its own Makefile with the name Makefile.example. To build a specific example it is as easy as typing:
There is also a master Makefile, building all examples:
To clean up:
Please Note: since there are two architectures in this tutorial (LINUX and LINUX64), the binaries have to be compiles each on hydra and dev0.
To build and run all the examples, all examples and the current working directory have to be /home/mario/pvm.
cfg
This example show how to obtain the configuration of the virutal machine. Running the example shows all machines added to the virtual machine, their architecture, etc.
#include <stdio.h>
#include <pvm3.h>

int main(int argc, char ** argv)
{
    int nhost;
    int narch;
    struct pvmhostinfo * hostinfo;
    struct pvmhostinfo * p;
    int i;

    i = pvm_config(&nhost, &narch, &hostinfo);
    if (i < 0) {
        printf("%s: unable to get config\n", argv[0]);
        pvm_exit();
        return -1;
    }

    printf("\n");
    for (i = 0; i < nhost; ++i) {
        p = hostinfo+i;
        printf("%s (%s) %d %d\n",
            p->hi_name, p->hi_arch, p->hi_tid, p->hi_speed);
    }
    printf("\n");

    pvm_exit();
    return 0;
}
To build this example individually:
Since this program just gets the configuration, building and running must only be done on hydra. Run it and see all machines:
More to come …