Introduction
To convert your appartment from (old) analog Telephone cabling to a (newer) ISDN cabling you don’t need to get a professional to do it. It is easy enough for every geek or other tech-interested people.
This advises are true for the country of switzerland. For specifics or possible differences (leagal or technology related), do not ask me.
If you’re going to try this out, please remember: I do not take any responsibilities or guarantees for anything. Try it on your own risk.
Requirements
This chapter describes what hardware and tools you will need in order to build your ISDN cabling.
Hardware
You will need the following parts:
Cables, 4 poles is necessary, 8 pol is recommended, 10/12 pol is perfect, the length depends on your appartment
2 x 100Ohm Resistor, do not use carbon based resistors, metal layer resistors are recommended (because of the aging)
Luster terminal (german: Lüster-Klemme), or similar
NT, the Network Terminator, this is the small box which you get from your telecom
RJ45 Plugs, depends on the NT
Plastic string (to tear the wires through the installed pipes)
Wall outlets, I recommend one of the two choices:
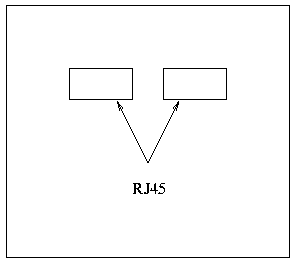
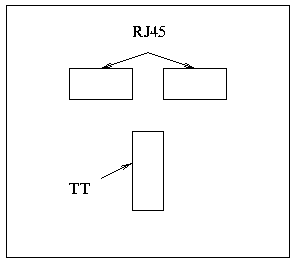
Tools
Most households are already in possession of the needed tools:
Screwdriver, I recommend an isolted one
RJ45 crimp pliers, depends on the NT
ISDN Basics
ISDN enables you to use digital telecommunication and offers plenty of features (most of theam are often forgotten). Mostly used features are:
A digital channel for the telephone (a digital on of course)
Computer communication, mostly Surfing on the Internet.
An analog channel for “normal” telephony.
ISDN offers you (normally) to use two lines at the same time. This means you’re able to talk to someone while your surfing in the Internet.
The S-Bus, mostly known as “digital channel”, is the one which is i in use whenever you’re using a digital device (telephone, computer, etc.). This S-Bus runs on 4 wires.
The additional analog lines are labelled 1 and 2 (plain and simple). Each of them run on 2 wires (two pairs): ab1 and ab2 (wire a and b of channel 1, 2 respectively).
The Cabling
First, let’s have a look at the cabling scheme, and then we go into the details.
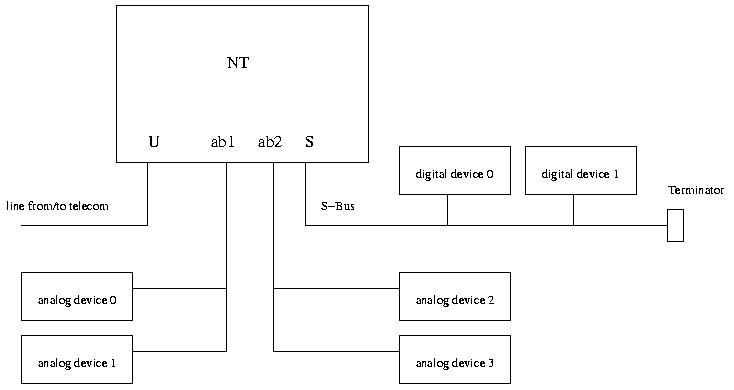
The very first thing you do is to find a place where you can put the NT. Remember, it has to be a place where you can leave the NT, where it is dry (surely not on the outside of the house!), and you have access to the mains and installation pipes.
Next is to install all the wires for the S-Bus. The best way is to form a pseudo-star (see picture below). This means you use the 8 wire cable or two 4 wire cables and go from the NT to each outlet and back to the NT. The cabling seems to be a star topology, if fact, it’s still a bus. At each end you install one outlet. At the other end (by the NT) you have to connect one backcoming cable to one outgoing cable. The very beginning is to connect to the NT and the very end of the bus is for the bus termination.
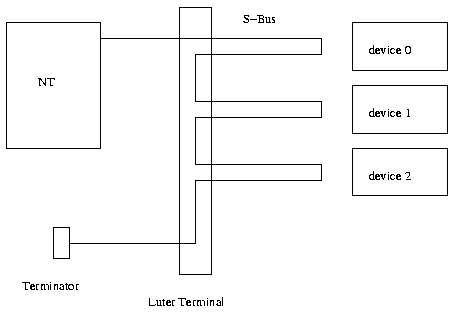
The termination is done with the two 100 Ohm resistors, that was mentioned above. Install them, using a luster terminal, like it’s shown in the picture below.
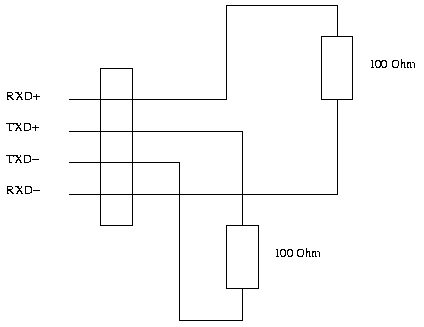
Read the manual of the NT how to program the device. This is necessary to let the device to know about your numbers that you got from the telecom. In many cases you just need the main number. Many other need the second number for FAX or for the computer. Only a few need all 3..5 numbers. How many numbers you got from the telecom depends on what package you ordedred.
All further steps are not always necessary. Read on if you like to install some analog channels as well. If not test the S-Bus with a digital device. It works, congratulations, if not, you have to find the bug. Most possible sources of errors are:
the programming of the NT went wrong
the cabling is wrong, probably you swapped some wires (non-intentionally)
To install some analog channels, first think about at which outlet you like those channels. If you installed the 12 wired cables in the prior steps, you’re luck because you just need to connect two pairs to ‘ab1’ and ‘ab2’ respectively. This may be a real star topology.
Maybe you used 4 wired or 8 wired cables. In this case you have to install one or two 2 wired calbes to conntect the analog channels to the outlets. As already mentioned, this cables can be in a readl star topology, and one wire pair connected to ‘ab1’ and/or ‘ab2’.
Of course: you have to test your installation and you have to make sure you have a contract with the telecom and they have switched your line to ISDN.
Be aware: do NOT try to connect a “normal” analog telephone device to the new ISDN line!! The voltage is different and your device could be destroyed! Do only connect the NT to the ISDN enabled line!
Glossary
ISDN : Integrated Services Digital Network. Network designed for purposes of telecommunication with a broad offer of features.
NT : Network Terminator. This is a (relatively) small device which terminates the network from the view of the telecom. For the user it is the device which handles all the communication from and to your flat/house.